Tamiya 1/48 Spitfire Mk.I
by Phil Jones

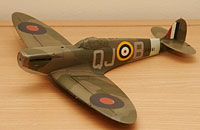
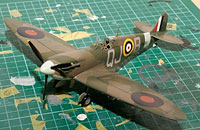
This is a Spitfire Mk.I of 92 Sqn, RAF, built from the Tamiya 1/48 kit.
BACKGROUND
After not doing any modelling for a year and realising I had space available to do some spraying work at our new place, I decided it was time to dig out my modelling tools again. I still had a stash of kits and numerous half-built projects but I felt that in order to re-ignite my love of the hobby it was better to start afresh. Thinking about what kit to build, I soon zeroed in on a Tamiya 1/48 warbird.
THE KIT
Having build the Tamiya 1/48 Spitfire and Mustang kits previously, I was aware of the quality of both and I decided on the Spit after being inspired by the James May "Toy Stories" programme. It is well known that the Tamiya Spitfire in its various guises is a pleasure to build and the crisp, engraved surface detail makes for a beautilful final result. Brett Green of Hyperscale describes it as "an almost viceless build" and I absolutely agree.
CONSTRUCTION
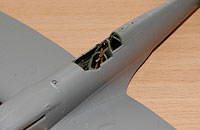
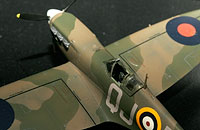
Starting with the nicely detailed kit parts, I sprayed a base colour of Xtracrylix Aircraft Grey/Green. Painting black for the instrument panel and various details I then lightly drybrushed in black to give a weathered look. This was after a failed attempt at a wash in Tamiya smoke that went wrong - I started removing the base colour when wiping off the excess!
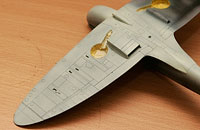
The kit goes together very quickly indeed and once the cockpit was complete, it is not very long at all before one can be ready to start the main paint scheme. I needed very little filler - and none at all at the wing roots thanks to the well engineered kit parts alignment tabs.
PAINTING
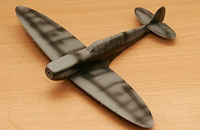
After masking up the canopy with Tamiya tape I began by spraying a base coat of Halfords grey primer. After realising that Xtracrylix seem to scrape off rather easily during painting an F-15E cockpit, I never spray them on an un-primed surface! This was the first time I have tried pre-shading a model and I think I need a finer tip for my airbrush because I didn't get particuarly thin lines or much accuracy either.
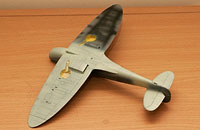
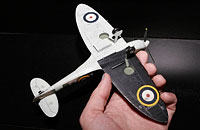
The first colour to go on was Xtracrylix Sky which I lightened with a bit of white after thinking it was too dark out of the pot. Truthfully, I've no idea if this made it more accurate but it was more pleasing to my eye. I was also quite pleased with the effect of the preshade. The second colour was the black for the underside of the port wing after which I masked off the lower surfaces before cracking on with the camouflage.
On the upper surfaces I started with Xtracrylix Dark Earth and after masking the camouflage pattern with Tamiya tape I then sprayed Xtracrylix Dark Green. Supplied with the kit is a very useful diagram of the camouflage at 1/48 size, so I used this to trace out the demarkation lines before cutting the tape. After removing the masking tape, I was very happy with how the camouflage had come out and the next step was to spray a couple coats of Klear to make a glossy surface for the decals.
DECALS
I used the kit decals as I wanted to keep this to an out-of-the-box build. After applying the white discs that go under the roundels I realised that perhaps I would have been better off investing in an aftermaket set! The needed quite a lot of encouragement to bed down into the recessed panel lines and on the wing roundels especially, they didn't conform very well to the raised detail either. In spite of this I soldiered on, wanting so much to have my first completed model in a long time.
WEATHERING
To make the panel lines stand out a bit more I tried out the Promodeller Dark Dirt weathering wash. Whilst it worked nicely on the Sky colour, the effect was a lot more subtle on the darker camouflage colours. I think this was more down to my choice of colour than anything else and I plan to get the black wash to add to my paint box soon. The wash itself is very easy to use and I would recommend it to anyone.
FINISHING TOUCHES
Once the weathering was complete, I used Xtracrylix Matt Varnish to seal eveything in. I'm not sure why but the final finish isn't all that "flat". The pot of varnish had been on the shelf for a while though so part of me wonders if it has settled or gone off.
CONCLUSIONS
The whole project took me about a month to get through - doing "a little and often" - I'm not good at marathon modelling sessionns! I found that the ease of construction of the kit stopped me from test-fitting as much as I usually do as this slows me down a lot! I would recommend the Tamiya 1/48 kit to anyone as it is a very easy build and I am very pleased to have my first finished model for a long time on the shelf!

