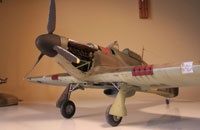
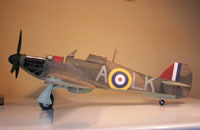
Airfix 1/24 Hurricane Mk.I
by Alan Roffey

1973 this was issued, but I never made it when I was a kid. I read on the international network someone saying, referring to the Trumpeter 1/24 Hurricane, that if you have the Airfix offering, you should throw it away and build the latest fantastic plastic from China.
INTRODUCTION
Well, like most serious modellers, I've looked inside the Trumpeter box and read the articles about it. Naturally, the Trumpeter kit is superior. It should be. It has about 35 years on the Airfix kit. But Airfix did very well all those years ago. It's stood the test of time, unlike their earlier Spitfire and Me 109. I'd never considered buying Airfix's Hurricane until I had a look at a friends in its unmade state, and immediately saw it was a cut above the Spit and 109. I must admit though, after I'd just started building it, and saw a Trumpeter one at the Telford show for 45 quids (3 years ago I think), I was tempted, but decided to stick with nostalgia.
THE KIT
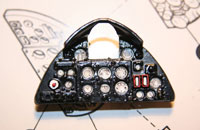
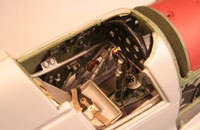
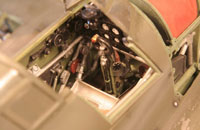
For its age, I think the cockpit is very impressive. Having sat in the cockpit of the real thing at Coningsby (BBMF) in 2002, building and painting this area was very interesting and satisfying. When I sat in it, at least one of the side panels was off, so I'm not sure how accurate this part of the cockpit is, but the rest is bloody good for 1973! The undercarriage also stands up well (no pun intended), including the wheel bay, an area sadly lacking on their Spit and 109. The gun bays are less impressive, but adequate. I dare say this is an area on the Trumpeter kit that excels. Like all engines in these kits, a certain amount of 'plumbing' needs adding to make it more accurate. I'm not that way inclined however, and satisfied myself with some weathering.
I also read on the internet that the wing is too thick, the fuselage 2 or 3mm out, and the top of the nose is bla, bla, bla, bla--- Who cares? The wing too thick? That's one of the things the Hurricane's well known for isn't it? What's the problem? Some people don't like rubber tyres in kits. Well I do, especially when you've got rid of their shine with a sanding stick. And these have 'Dunlop Aeroplane' written on them. The clear parts do leave a bit to be desired. Their fit is not that good, especially those that fit to the wing. It was considerate of Airfix to supply me with two sets of transfers, which are clear in register and definitely the right colours, something you cannot be guaranteed of with a Trumpeter kit.
That seems to be enough pre build ranting and rambling from me, as I'm sure you are thinking, if you've managed to read thus far!
THE ENGINE
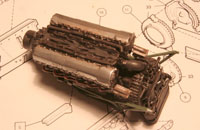
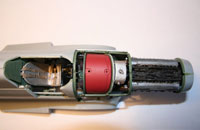
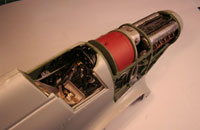
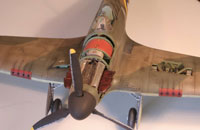
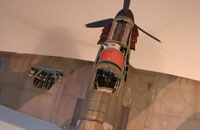
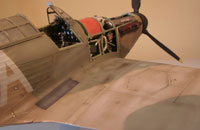
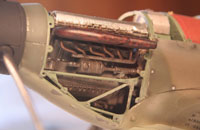
Like the instructions, I started with the engine. Having had a close look at the Merlin on Trumpeter's 1/24 Spitfire V I made some time ago, I don't think it's any better than the Airfix engine. 'Rolls Royce' is embossed on the valve covers, something that is lacking on Trump's Spit. I blacked the whole thing up with Humbrol 33, except the valve covers, which I did silver. I dry brushed the black with a gunmetal colour. The only other areas not black are the plug leads in bronze. A thin rusty brown solution of Mig pigments and Tamiya thinner was washed onto the engine to convey some grime. Oil deposits were done with undiluted Tamiya Smoke.
THE COCKPIT
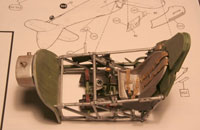
Humbrol matt aluminium Metal Coat was applied to the seat and tubular framing, while the rest of the Pilot's office was treated to the standard Interior Green. A black Mig pigments wash was smothered all over this, and the green areas were given a dry brush of Aeromaster Nakajima Interior Green.
The seat harness is an MDC product; their RAF/FAA Sutton harness, which I think has come up well with a wash to enhance the paint. From reference photos, it seemed to me the trim wheel was probably made of bakelite, as its colour is red brown, so I used Humbrol Satin 133. Pewter coloured 'rub 'n' buff' is dry brushed in appropriate places for paint wear.
THE UNDERCARRIAGE
Virtually every part of the undercarriage has been painted matt aluminium and been given a black/brown wash of Mig pigments, Tamiya smoke being added for oil stains.
THE GUN BAY
The port gun bay (the starboard is closed up) has the same weathering treatment as used in the cockpit.
PUTTING THE THING TOGETHER
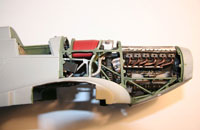
On being ready to fit the cockpit and engine, I was apprehensive about the fit of it all into the fuselage, and also the wings going on later. Would the engine/firewall and fuel tank/cockpit be too short or long? Would the cockpit framing foul on top of the undercarriage bay? I wasn't prepared to start gluing things together and leave it to chance, so I went through a series of fiddly dry fitting procedures with the fuselage halves, cockpit, engine, undercarriage bay, and lower wing. Things fitted almost OK; I just trimmed a bit off the bottom of the firewall and shaved off some plastic from the part of the fuselage that goes over the undercarriage bay, to be safe.
Having done this, I decided the cockpit and engine were best fitted separately instead of as one unit. I glued the cockpit in first with cyano. That was the easy part! Getting the engine in and properly married up with the firewall and nose of the fuselage was much more tricky. I glued the engine to the firewall, but realised it was best not to do the same with the prop reduction gear housing at this stage. After slipping in the tail wheel leg, I glued the rear of the fuselage halves together using poly cement. After this I cemented the nose halves together using cyano, afterwards realising the front of the cowling was not properly vertical. After getting them apart to reposition them, I had to accept a gap at the top front of the nose, which I filled with cyano gel. The sharp eyed amongst you though, will see that this join is not 100%.
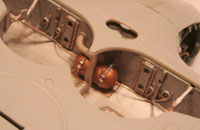
On to the wheel bay then. I know not all Hurricanes had their air bottles for guns and brakes coloured copper, but I like it so did mine in this hue, matting it done with Humbrol matt varnish. After checking photos, I added fuse wire leading from either end of the air bottle going into the roof of the wheel bay, leaving it unpainted.
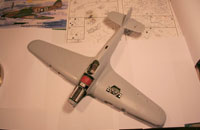
I found the upper to lower wing fit to be quite good, which was nice! But prior to putting these together, the gun bay and wheel bay were glued and held down by a copy of the hefty Warplanes of the Third Reich by William Green! Not really appropriate for a Hawker Hurricane, but never mind. I glued the ailerons in the neutral position. A quick dry fit of wing to fuselage revealed a reasonable fit, but by no means perfect. A little work would be required. Similarly, some filler was required for the fin to horizontal stabilisers joins. That completed the airframe. Now for some paint.
PAINTING
I sprayed acrylic Citadel Boltgun metal darkened slightly with black on all metal areas, leaving the fabric covered areas in bare plastic.
After reading what I thought was a good idea on the internet, I spent a lot of time painting the model with artist water colour paints, which actually sprayed quite well!! The idea being that it would make scuffing/chipping the paintwork very easy by using water to remove the paint. The problem was, the paint was just not durable to any degree. It rubbed off very easily when the model was handled. As a result, I had to abandon the idea. This set back made me leave the kit languishing on a shelf for many, many months. When I eventually resumed the project, I stripped the water paint by simply holding the model under a running cold tap.
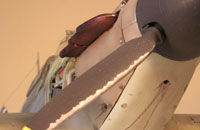
During the time the project was shelved, I converted from acrylics to enamels, and so I sprayed the kit with White Ensign paints, post fading the panels by adding white to the camouflage colours. These paints spray trouble free, have a nice smooth finish, and are durable. It is very important when fading, to add only one or two drops of white. If one lightens the colour too much, it just doesn't look right. Before the paint set completely, I used the modelling knife to chip the paint revealing the Citadel metal colour beneath. This turned out much easier than I expected. I also used abrasive action with a fine nail polishing stick, to discolour the paint.
Before the paint set completely, I used the modelling knife to chip the paint revealing the Citadel metal colour beneath. This turned out much easier than I expected. I also used abrasive action with a fine nail polishing stick, to discolour the paint.
TRANSFERS
Yes, transfers. Not decals. When I was a kid in the 70s they were always called transfers, and that's all there is to it.
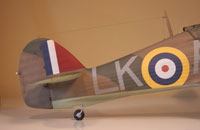
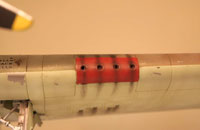
These look good on their backing sheet, but turned out to be flaky and did not respond much to setting solution. After doing two wing roundels, I realised Airfix's embossed rivet detail was making the task a lot harder. Therefore, for the other two, I sanded down these rivets to provide a smooth surface for the transfers to settle down more easily. The fuselage markings went on somewhat easier, there being no rivets.
The red portion of the fin flash is painted Humbrol acrylic red with some black added, Airfix only supplying the blue and white portion. With these out of the way, I could now go to town on the weathering.
WEATHERING
I did the following:
- Faded the upper wing roundels with varnish with a couple of drops of white added.
- Wing streaking and general dirty staining with thinned Tamiya Smoke.
- Filled the panel lines with Pro-Modellers Dark Dirt Wash.
- Black pastel chalk for gun smoke.
- Oil stains are Mig's Oil/grease stains mix; fuel stains being a thinned amount of the same.
- The exhausts have been stained with a dark brown alcohol ink.
- Exhaust stains are sprayed light grey and then black over this.
CONCLUSIONS
And so it was finished, about 2 ½ years after I started it!! However, apart from the cock up with experimenting with water colours, I enjoyed it. If you have one in your stash, get it out now and make it.
I'm now tempted to buy Trumpeters Mk IID with those bloody great cannon on it.

