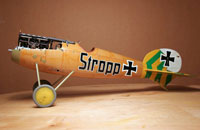
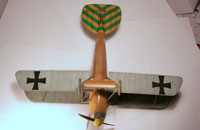
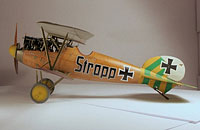
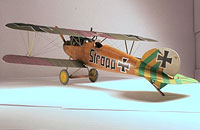
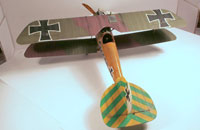
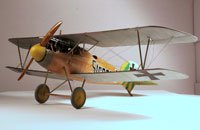
Wingnut Wings 1/32 Albatros D.Va
by Alan Roffey

Had to have one of these kits. Expensive, by the time you pay the handling charge etc., but still had to have one. The instruction booklet is luxurious, but I cannot helping thinking that ordinary instructions would have kept the price down. What a model though; you can see the passion that's gone into it. The PE makes up the seat harness, MG jackets, gun sights, and a couple of other things. The transfers are Cartograph, so they must be alright.
Let's Get Started
Cockpit:
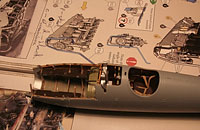
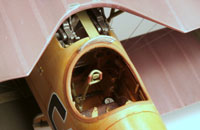
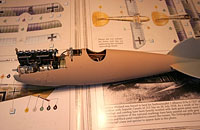
I painted the wooden areas; inside of fuselage etc. Tamiya wooden deck tan and ‘washed’ it with Revell clear orange. This gave it a satin finish. The interior metal parts I painted in Revell SM362, a satin green I believe has been in my paint tray for some considerable time. After getting the cockpit bulkheads together with the seat on them, initial dry fits of this inside the fuselage halves were not promising. Now I wasn’t expecting that! However, by cutting a small piece out of the top of the forward cockpit bulkhead and scraping some plastic from the edge of the seat bulkhead, I managed to get things fitting a lot better. Panic over, but what joy would the engine bulkheads bring me; all five of them!! Well, plenty actually. They fitted fine.
Engine:
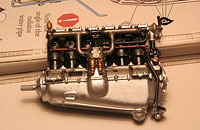
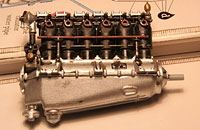
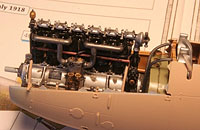
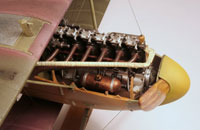
So onto the engine itself, and what a sexy beast it is. Definitely one of the best parts of the kit for me. It’s important, because even with the engine covers on, a lot of it can still be seen, as some of you will have noticed at our club;s 2010 show; remember, there was one in the competition, and mighty fine it was too. Before I finished painting the engine, I realised I could put the fuselage halves together first, even though the instruction have you put the engine in first. I couldn’t quite close the gap at the middle bottom of the fuselage, so had to fill this with gel super glue. Anyway I digress, so back to the engine. I dirtied it up with Pro-modellers Dark Dirt wash, followed by MIG`s oil and grease stains. It fitted into it’s bay with no problems. The tailplane went on without incident.
It was at this point that, before doing the MG`s, I couldn’t resist dry fitting the lower wings to the fuselage. They were such a tight fit I decided I wouldn’t glue them. All three wing sections are really excellent mouldings. It’s a pity then that they are quite difficult to cut off the sprue without damage. The attachment points are rather wide. While I’m in complaining Grumpy Old Man mode, the instructions look good, but from a functionality point of view, I found them wanting. Give me the old exploded view any day. I know they use colour coding, but despite this, I found I was missing parts out! Maybe it’s just an age thing.
Rigging Prep:
This was as good a time as any to deal with the rigging holes. Wingnut Wings provide these, but for my liking they are not deep enough, so I deepened them on the upper wing, and drilled completely through the lower wings; the idea being to glue into underside of upper wing and thread through lower wing to get tautness. These best laid plans went awry, as we shall see, and showed up my limited experience of building biplanes!
Machine Guns:
These were a disappointment for me as, no matter how much I tried annealing them, I could not get the front of the PE jackets to conform to proper circles. Therefore, I reluctantly used the plastic items, but with PE sights attached.
Fuselage Paint:
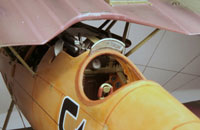
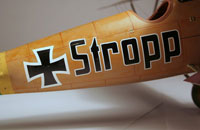
How to represent the unpainted wooden fuselage; always a tricky one. I decided to go with the finish shown in the colour photos of the Australian War Memorial’s example which are in the instructions. This meant doing the same finish I used for the cockpit. I highlighted the panel lines with a red brown 005 felt tip pen.
Wings Paint:
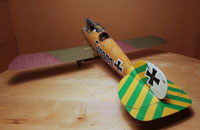
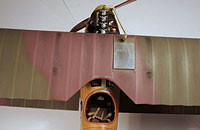
Such is the construction and painting sequence with biplanes, that I next sprayed the underside of the wings White Ensign RLM76, and post faded them by adding white. This is a joy to do on First World War aircraft due to the ribbing tapes; nice ‘n’ easy straight strokes with the airbrush! I followed this a couple of days later with White Ensign Dark Olive Green (a British Second World War colour) and so called light purple brown, which isn’t very light as it happens. I faded them in the same way as with the RLM76. This twin process does not complete the effect. The third element is to highlight the ribbing tapes, which is beyond the capabilities of my airbrush, so they were hand painted the same shade as the faded airbrush coat, with quite a lot of thinning. I used Humbrol 24 for the yellow tail, and coated this with Johnson’s Klear to accept the large transfers.
And now for something completely different. One of the photo captions in the instructions notes how the water pipe from the radiator is wrapped in white asbestos cloth. I fancied replicating this, and the obvious choice was Tamiya masking tape. I cut up some 2-3 mil strips, wrapped them around the pipe and painted it PolyScale dirty white. I think the effect looks quite good.
Undercarriage:
Time to put the undercarriage together. A departure from the instructions because I felt like it. It’s attachment was not difficult, but the resultant assembly is a bit, well, wobbly.
Transfers:
Decals to you modern types out there! This is what I like about building biplane kits; there’s variety all the way through the build. I got some of the green tail stripes a bit mixed up, which meant touching up with yellow and green paint, but never mind eh! Having done these, I opted to carry on and did all the remaining transfers.
Early Stages of Weathering:
I sprayed the model with White Ensign satin varnish. I then dirtied the wings with Pro-modellers Dark Dirt wash, applying by airbrush and then blending in with moistened cotton wool buds. However, I realised the surface was too slippery for the wash to grip properly, so went over with matt varnish and started again.
Upper Wing:
Now for that crucial moment in any biplane build: attaching the upper wing. This makes or breaks the whole kit. Get it wrong and you wont want to look at it on the shelf, and worse still, your modelling friends may be indiscreet enough to laugh at it! I have such ‘friends’! This is my way of tackling it. I glue the struts to the lower wing(s) and fuselage, usually with poly cement to maintain a modicum of flexibility when presenting the upper wing. I place the upper wing up side down on a flat level surface. I then invert the aircraft and place it on the upper wing, enabling me to clearly see where the struts locate. Then, instead of trying to glue all the struts in one go, I do them two at a time. In this case, I started with the cabane strut front joints, then the outer strut joints (2 at a time), then the cabane strut rear joints, using gel super glue and accelerator. Simples! Rather than being a stressful experience, I found this operation gave me a buzz! The alignment is not bang on, but is very close. With the extra weight of the upper wing, when you nudge the model, it makes the whole thing wobble like jelly on a plate! But the undercarriage has no problem taking the weight.
Frigging In The Rigging
The upper wing may have given me a buzz, but the rigging wasn’t so joyful! After gluing into the holes in the upper wing, when pulling on the invisible thread, it would always ping out. Therefore, I went to plan B; ie: drill through the upper wing as well. This does make for an easier quicker method by threading through to make several connections with one piece; eg: all the diagonal lines on the wing and the two down from cabanes to wing root are done with one continuous length of thread. However, it leaves the problem of tidying up the holes. I used Stancraft 100% nylon invisible thread from a wool and fabrics shop. I found that the fishing line I used to use contracts when painted - not good news for biplane rigging! I’m afraid my biplane modelling skills do not extend to fitting turnbuckles.
Problem:
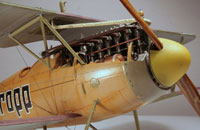
Meanwhile, the excessive handling of the model from doing the rigging, badly disturbed the Revell clear orange finish on the fuselage. This stuff didn’t seem to dry 100%. After a couple of attempted repair jobs, I had to bite the bullet and sand back to bare plastic on top and, to a much lesser extent, the bottom of the fuselage. The sides escaped damage due to protection from the ‘Stropp’ transfers. I had to mask off the cockpit and transfers to spray Tamiya wooden deck tan. A frustrating performance right near the end of the build.
A Bit More Weathering:
For general grime hear and there, I sprayed on some black alcohol ink, thinned rather a lot. Most of this went on the upper wing, especially in the central area to depict oily grime coming back from the engine.
So there it is; my first Wingnut Wings kit. I know there are going to be more.
Self Critique:
On reflection, the Revell clear orange for varnish doesn’t really cut the mustard, and I wont be using again. I haven’t disguised the rigging holes in the upper wing well enough. Next time I’ll rig before painting the upper wing, enabling me to fill and sand freely. You’ll notice from the photos both aileron controls wires have come loose. I was so frustrated at the end of a long build with having to redo the fuselage varnish effect, I didn’t bother to re-rig them before taking the photographs!

