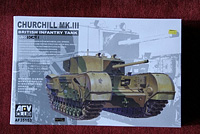
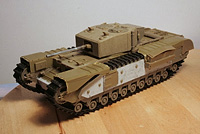
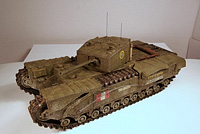
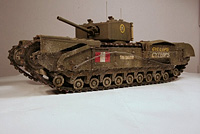
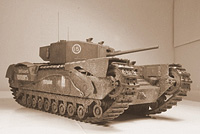
AFV Club 1/35 Churchill
by Alan Roffey

The only Churchill model I made before this was the Airfix 1/72 when I was a kid. The Tamiya 1/35 was released about the time I stopped model making to pursue beer and girls. I was very successful at drinking beer but, sadly, not so good at the other.
Anyway, I digress. The point is, because of this, I never got to buy the Tamiya kit, let alone make it. When I got back into 1/35 armour, I decided the Tamiya kit was too long in the tooth, so was delighted to discover a relatively new kid on the block produced a state of the art Churchill.
Let's build it:
Running gear
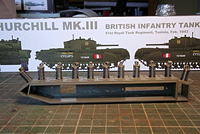
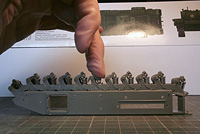
To say this kit is complex is an understatement. The parts for the running gear are pretty much as per the real tank, and give a fully working suspension system. Completely unnecessary in a plastic display model, but very interesting never the less. Putting this system together turned out not to be the frustrating nightmare I was expecting, after I'd learnt not to follow the instructions! The instructions don't tell you not to glue the plastic parts, surrounded by the metal springs, to the underside of the hull sponsors. They should, otherwise the suspension won't go up and down!
Also, the fitting of the suspension swing arms between the retaining supports is best done by clipping them in after the retaining supports have been glued in place to the hull sponsors. To try and keep them all in place whilst attempting to trap them with the supports, I would wager, is in fact, impossible!
Hull
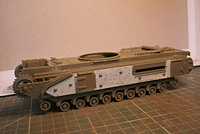
Gluing the completed side units, hull bottom plate, and rear plate together went quite well. Not a 100% good fit, but good enough. For me anyway. As you've probably gathered by now, I'm not that fussy. At this point I deviated from the instructions, as I wanted all the other hull plates on asap to complete the whole hull structure. This went alright with a bit of persuasion.
Armour Texture
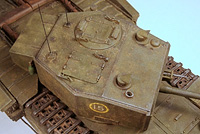
I applied some Mr. Surfacer 500 for armour texture on sides and front of the hull. On the turret I used liquid poly cement instead. I can never decide which method I prefer, so ended up using both.
Tracks And Their Guards
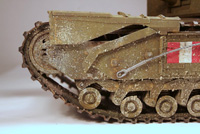
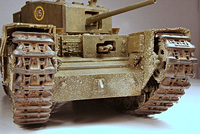
I put the tracks on prior to painting, and the track guards in place, leaving off the centre ones, which a lot of units did to avoid snagging of the turret on them if they got damaged. I also left off the curved front guards, which reduced the amount off dust and improved the driver's view. The rest of the kit went together no problem.
Painting
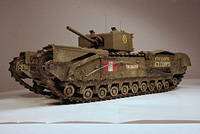
I used three greens to paint my Churchill; a pre-shade of White Ensign's RLM 71, a top coat of W.E. 1943 Olive Drab, and a haphazard application of a W.E. generic dark green, the lightest of the three. I also used this last green to start off the rain marks. Yes, it does rain in Tunisia in the Winter.
I continued this with Adirondack Pebble coloured Alcohol Ink (a dark green shade). After that, from the same manufacturer, I used a Hazelnut colour to represent a hint here and there of dark rust. Then I realised I should have put the transfers on by now!
Withering Weathering
After applying the markings, I tried the sponge chipping technique, which it seems you must do these days if you follow the fashion in the model mags. This was only the second time I attempted it, the first time being a failure. This time I was a bit more successful, but it never shows up too well on the dark green of Allied armour, and a later wash virtually obliterated it. I need to think again on this one!
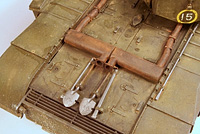
Dry brushing's not too trendy these days, but on dark subjects like this, I think it's needed to pop out the detail. I mixed two Humbrols; a dark green with an ochre yellow. I then felt some form of wash was required. I used a brown one from SIN Industries (MIG). Unfortunately, this dried overdone in places, especially on the turret. However, the more I looked at it, the more it grew on me. In the end though, I felt some of it needed toning down, and you cannot get It off once it's on, so I went over with a Humbrol very dark, but thin, brown wash. Mig's oil and grease stains went on the engine deck along with some of their black pigment scuffed here and there.
I ended up painting the tracks burnt umber oil paint, 'washing' them in brown, and rubbing graphite on the treads. The tried Tunisian light coloured mud is made up mainly of Chinchilla dust for texture, mixed with suitably coloured paint, and applied by blowing air through a flat brush loaded with it, and that was pretty much it.
Final Thoughts
I enjoyed this kit. It's leagues ahead of the old Tamiya kit, and has an interesting parts break down which presents a bit of a challenge. The paint job has furthered a growing obsession to try and get a perfect subtle mix of greens to produce an interesting looking Allied tank. I don't have an appropriate subject in my stash at the moment, so I'll have to sort that out at the next model show.
